Managing Swap Memory in Ubuntu

Have you remember creating a Swap Partition when installing Ubuntu. In the Partition Section?
You can check that using this command.
lsblk
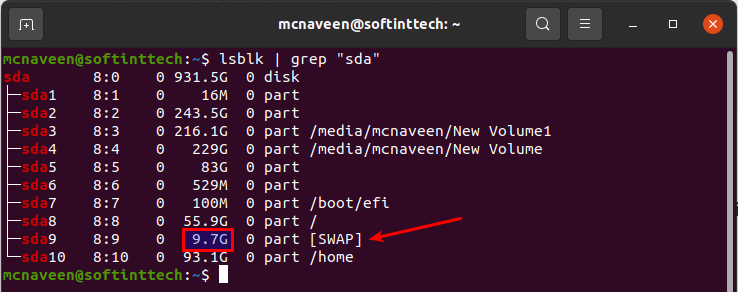
As you can notice in the Above Screenshot, I have my SWAP Partition present in sda9. (This may differ for you).
You can also check with the command to make sure the swap is enabled.
sudo swapon --show

You can also check with the command.
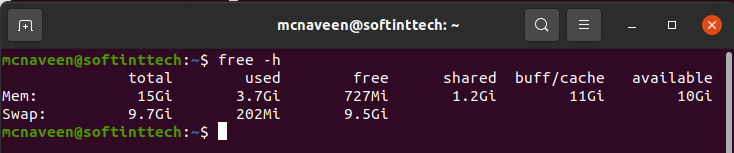
free -h
Adjusting the Swap in your Ubuntu System
Swappiness is a Linux Kernel Parameter or Value which assigns how much the system swaps data out of RAM to the swap partition. The higher value means the higher the usage of swap partition by the kernel.
It can be set between 0 to 100 but I recommend to keep it as low as possible.
By default, the swappiness value is set to 60 by Ubuntu System.
We have to make it as low as possible.
Temporary Solution
This method doesn't require restart. Just open the terminal and run the follow command.
cat /proc/sys/vm/swappiness
The Above command will output 60. If yes. Keep going.
sudo sysctl -w vm.swappiness=10
Above command will change the default swappiness value to 10. Now again verify the value 10 with the following command.
cat /proc/sys/vm/swappiness
This time you'll see the output as 10.
Permanent Solution
To change the swappiness value permanently you have to edit the file. Keep following the below commands to do that.
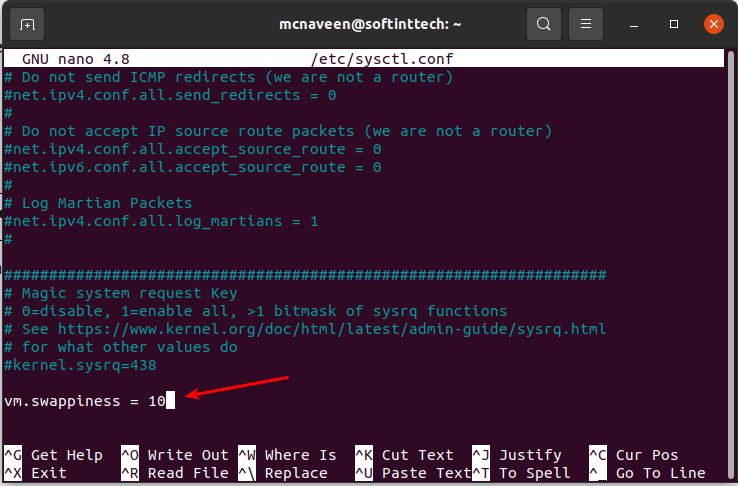
sudo nano /etc/sysctl.conf
This will open the sysctl file in nano text editor.
Now, Add the below line in end of the file.
vm.swappiness = 10
Then Press Ctrl + O to save & Ctrl + X to close it.
Then run the below command to apply the changes.
sudo sysctl -p
Editing the Cache Pressure Setting in Ubuntu
vfs_cache_pressure value specifies how much the system should cache inode and dentry data over other data.
You can simply set the value by run the follow command.
sudo sysctl vm.vfs_cache_pressure=50
But the above one is a temporary solution. To make it permanent follow the below commands.
sudo nano /etc/sysctl.conf
This will open the sysctl file in nano text editor.
Now, Add the below line in end of the file.
vm.vfs_cache_pressure=50
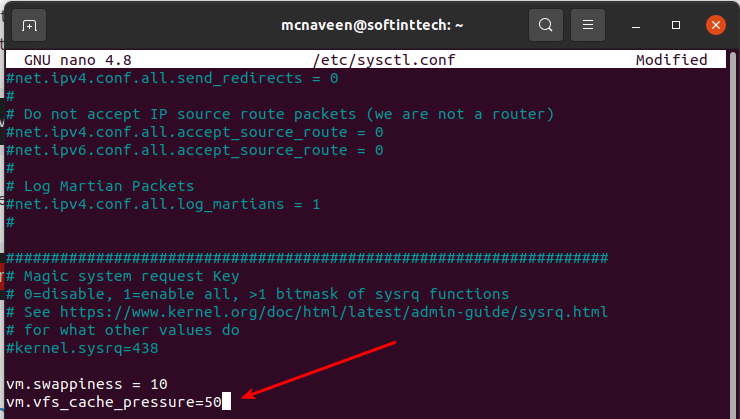
Then Press Ctrl + O to save & Ctrl + X to close it.
Now, Apply the Changes.
sudo sysctl -p
This command will output similar to this.
mcnaveen@letsfoss:~$ sudo sysctl -p
vm.swappiness = 10
vm.vfs_cache_pressure = 50
That's it for this article.
Hope you feel little bit increase of performance.